Vampire Runner Christmas Edition on Android Market
We wanted to make something special for our most successful game and our players so we added some Christmas happiness to Vampire Runner:
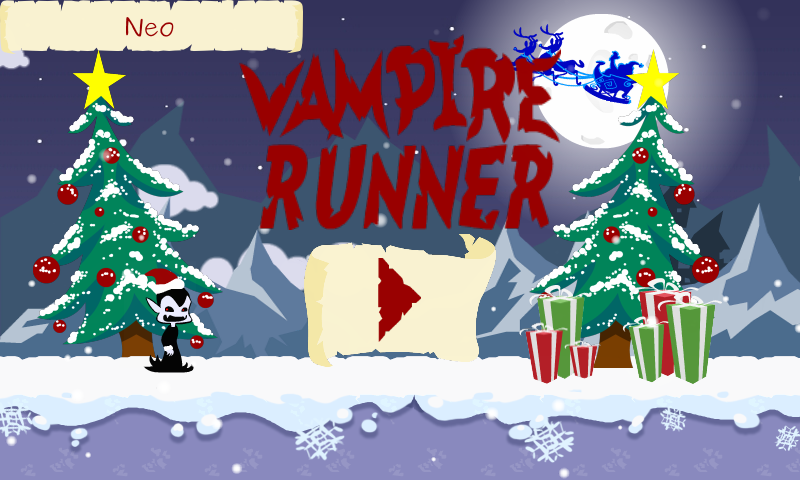
The changes for this version were:
- Christmas Theme - Presents, Trees, Christmas Hats, and Snow.
- Musics are disabled the first time you run the game, to avoid a bug between OpenFeint dialog and LibGDX (you can enable the music in the main menu screen).
- For the Android Version - We now support paging on our highscore screen so you can see more scores.
- Created Vampire Runners Facebook Page and added a button to go there from the Credits Screen.
Here is the QR-code if you want to easy access from your Android device:
If you installed and liked the game, please rate it on the market, and share it with your friends and everyone you know.
Vampire Runner version 1.0.0 on Android Market
We were working hard to make a new release of Vampire Runner with some big changes.
Mainly, all graphics assets were remade by Estudio Egg, so the game looks tons of times nicer now. Take a look:
Then, we also improved game mechanics by adding different transformations to the vampire to move through different obstacles, so the game is a bit more interesting now.
Finally, if you play the game on Android, we also added OpenFeint integration, so if you already use OpenFeint with friends, you can compete with them to be the best Vampire Runner.
Here is the QR-code if you want to easy access from your Android device:
The game changed a lot from what it was, hope you enjoy the changes.
If you installed and liked the game, please rate it on the market, and share it with your friends and everyone you know.
Resizable Applets and Applications with LWJGL
Some posts before, in the comments section, Gornova asked me to write about resizable Applets if I had some time. As I never used resizable LWJGL Applets, I had to do some research. This post is to show what I found.
(note: LWJGL version 2.8.2 was used for all the tests I made).
Introduction
LWJGL Applets are similar to LWJGL Applications, they work using a class named Display which uses an AWT Canvas component. On desktop, you create a JFrame or similar and add inside a Canvas, on Applet you just create the Canvas and add it to the Applet. Unless you want some custom behavior, I believe that is the common usage.
(note: using fullscreen is a different case but has no meaning for this post)
How to resize an Applet
To resize an Applet on the browser, two possible ways are, use Javascript to change the applet tag sizes or just configure the HTML applet tag to adapt to its container size, so if you resize the browser window then all corresponding HTML components are resized.
The other way around, suppose you have a way inside your game to choose the game resolution, you will have to communicate that to the Browser, probably calling a Javascript function from your Applet to let the Browser react to the change.
How to handle Applet resize
If you are working with LWJGL directly, then it depends a lot of how which kind of layout are you using for the container of the Canvas object. For example, if you chose a layout which grows to the parent container size, then each time you resize the container, the Canvas will be resized. If you chose another layout, then maybe you will call Canvas.setSize() by hand.
However, you need to react to that change in your game, to do that the best way (imho) is use a similar approach LibGDX does. What LibGDX does is, its stores the current Canvas size on each iteration of the main application loop, on the next iteration, if the Canvas size is different to the stored, then it calls a resize() method to tell your game the screen size changed.
Another way is to create a ComponentListener and add that to the Canvas component so each time the componentResized() method is called you resize your game. However as all the AWT stuff runs in another thread you need to store the new size and process the resize in your LWJGL thread to avoid problems.
What to do inside your game
The very basic approach is to just modify the OpenGL viewport of your game, then the game is scaled to the new size and, in some cases, that should be enough.
glViewport(0, 0, width, height);
However, You may want to take care about aspect ratio since just scaling the game could look ugly. One option is to modify the viewport in values to maintain the aspect ratio you want, for example:
glViewport(0, 0, width, width / aspectRatio);
You could also provide different common aspect ratios (4:3, 16:10, 16:9, etc). However, I believe the best option is to provide fixed commonly used resolutions like 640x480 or 800x600 instead.
In some cases you could want to adapt your game elements, for example GUI stuff, where you may want to maintain the element sizes and move them accordingly over the screen instead just scaling them.
Then, you have to take care of the user input. As mouse location is dependent on the viewport size, you will have to take that in mind when interacting with part of your application, like the GUI stuff, after a size change. For example, LibGDX Camera uses the current viewport size when using project and unproject methods (which allow you to transform world coordinates to viewport coordinates and vice versa).
Not so sure as I am not an OpenGL expert but if you work different cameras (model + projection matrices) you probably need to update them in order to render everything in the correct way. I have to go deeper in this issue.
Optionally, you may want make other changes when reacting to the resize like loading HD assets if you go to a higher resolution and vice versa.
Some issues
- You have some glitches if you do resize in real time (tested myself, but cant find references right now). However, in general nobody does this so it is not a big problem.
- I believe Applet resizing is not working on mac yet.
Conclusion
Handling all the mentioned things when resizing LWJGL Applets and LWJGL Applications depends a lot on the game you are making, in some cases the basic approach work fine and should be easy to implement.
Despite the article was focused mainly on LWJGL Applets, great part of the findings can be applied to LWJGL Applications as well.
This post is only to show some basic experimentation I made on the subject, as I said before, I am not an OpenGL nor LWJGL expert, so some assertions could be wrong. If you have more experience and want to contribute your opinion, feel free to do it.
Thanks and hope you like the post.
Some changes to animation4j to clean the API
Lately, animation4j API received some love by removing a lot of unused classes and improving a bit how things are used. Now both Transitions and Timelines (hence the animations based time lines) work over mutable objects only.
To illustrate some of the changes there are two examples shown in the next sections.
Transitions
This example shows how to use new API to create a Transition:
// a mutable object example, if you use LibGDX this could be a Vector2

	class MyObject {
		float a, b;
	}

	// we need a TypeConverter for that object, as explained in a previous post.
	// an instance of this class could be reused since holds no internal state

	class MyObjectTypeConverter implements TypeConverter<MyObject> {
		@Override
		public float[] copyFromObject(MyObject o, float[] x) {
			if (x == null)
				x = new float[variables()];
			x[0] = o.a;
			x[1] = o.b;
			return x;

		}

		@Override
		public MyObject copyToObject(MyObject o, float[] x) {
			if (o == null)
				o = new MyObject();
			o.a = x[0];
			o.b = x[1];
			return o;
		}

		@Override
		public int variables() {
			return 2;
		}
	}

	// now, to create a transition to be used we use the Transitions class which provides
	// some builder methods

	MyObjectTypeConverter myObjectTypeConverter = new MyObjectTypeConverter();
	MyObject myObject = new MyObject();

	Transition transition = Transitions.transition(myObject, myObjectTypeConverter) //
			.start(0f, 50f) //
			.end(1f, 50f, 100f) // (time, value1, value2, ....)
			.build();

	transition.update(0.5f);

	// this should print 25,75 since the update of the transition updated the object
	// directly.
	System.out.println("" + myObject.a + "," + myObject.b);
TransitionBuilder
TransitionBuilder changed its interface to create transitions specifying the object to be modified. It now also provides some methods which lets you specify the start and end values with a float[] by using var args, it is convenient if you want to write less code (you could avoid new Object(..)) but will generate garbage as new Object() does. The recommendation to avoid that is to reuse the end/start values, for example, if you want a Transition of a color from yellow to red, create the yellow and red colors and store them somewhere (maybe static final fields) and reuse them each time you need a new Transition.
Animations
This example shows how to create an Animation which uses a Timeline:
// using the same classes we defined before
	MyObjectTypeConverter myObjectTypeConverter = new MyObjectTypeConverter();
	MyObject myObject = new MyObject();

	Animation animation = Builders.animation(Builders.timeline() //
			.value(Builders.timelineValue(myObject, myObjectTypeConverter) //
				.keyFrame(0f, new MyObject(50, 50)) // at the beginning of the Timeline, the object should be at 50, 50
				.keyFrame(2f, new MyObject(100, 100)) // two seconds after that, it should be at 100, 100
				.keyFrame(10f, new MyObject(200, 200)) // eight seconds after that, it should be at 200, 200
		)) //
		.speed(2f) // we want the animation to run at double speed
		.build();

	animation.start(1); // starts the animation with 1 iteration.

	animation.update(1f);

	// this should print 100,100 since the update we asked for double speed.
	System.out.println("" + myObject.a + "," + myObject.b);

	animation.update(4f);

	// this should print 200,200
	System.out.println("" + myObject.a + "," + myObject.b);
(note: if you want more examples, there is an examples project with the project, some of the examples needs to be simplified but the idea of how to used animations and transitions should be clear enough)
Animation interface is very rich, it has methods to start the animation specifying the iterations you want, if you want to alternate directions or not, etc.
Immutable Objects
As I said before, animations and transitions can only be performed over mutable objects. This means you can’t animate a java.lang.Float or a java.awt.Color since you have no way to change their values without creating a new instance. To animate immutable objects the idea is to create your own mutable objects with the corresponding variables, animate them and then, when needed, create a new instance of the required immutable object using the values of the mutable instance, for example, new java.awt.Color(values).
Conclusion
All the changes were made to improve performance and reduce garbage generation, mainly because we are using the project on our Android games. The changes also improve the usability of the library since they reduce a lot of noise and reduce what you need to use. For example, all the modules slick2d, java2d and componentsengine were removed from the project since they had unused code and they depended on libraries that aren’t on maven central.
I wanted to share a bit the changes but, as things keep changing, for now all this stuff is on an unstable 0.2.0-SNAPSHOT version and wasn’t released on maven central yet.
Scripting with Artemis Entity System Framework
Artemis is a component based entity system framework made in Java by Arni Arent (appel) and Tiago Costa (spiegel).
The core of Artemis is small and it is based on four main concepts. The Component, where all information about an Entity is stored. The Entity, which represents a game object. The EntitySystem, where custom logic, for entities with one or more component, is processed. And finally the World, where Entities and EntitySystems live. The idea is to grow over those concepts by making your own Components and EntitySystems.
The problem
There are some cases where it depends a lot how are you using Artemis, to feel it is helping you or not. For example, when you want an Entity to have some custom behavior on a specific level you could follow the next approach.
First, create an SpecificBehaviorForLevelComponent to declare that an Entity with that component will have that custom behavior and then create the SpecificBehaviorForLevelSystem which performs the logic.
The problem with this approach is that you will have an empty Component used only as a mark to let the EntitySystem work over it. Also, you will have an EntitySystem that will perform logic only in a specific moment of the game and then it will be useless.
If you have to create more than just one custom behavior, then you are a bit doomed and you will hate Artemis. However, it is not Artemis, or any component based entity framework, fault.
Script Framework, a possible solution
To simplify working with cases like the one mentioned before, we created a scripting framework over Artemis, composed by three main concepts: the Script, the ScriptComponent and the ScriptSystem.
Script
This is an interface which provides the following three methods:
- init(world, entity) : called once when the entity enters the world.
- update(world, entity) : called in each world update
- dispose(world, entity) : called once when the entity leaves the world.
It should be implemented and added to the ScriptComponent of an Entity in order to perform the behavior.
ScriptComponent
This is an Artemis Component which contains a collection of Scripts and it is used by the ScriptSystem in order to know which Scripts to process on each Entity.
ScriptSystem
This is an Artemis EntitySystem responsible of calling, for each Entity, the init/update/dispose methods of each Script declared in the ScriptComponent of that Entity.
For the previous example, where we wanted a specific behavior for an entity in one level, we could create a SpecificBehaviorForLevelScript and, when loading that level, add that script to the ScriptComponent. So, instead creating Components and EntitySystems, we can create only Scripts.
Pros
- Clear and simple API.
- Easy to add/remove a Script vs add/remove a System.
- Scripts are easily reusable (when you want two or more entities with a custom behavior).
- Logic localized in one place.
- Allow different implementations of the Script interface, for example, a Groovy implementation.
Cons
- Not good for global stuff like rendering, an EntitySystem keeps being better for those cases.
- Hard to know the right balance between which code should be on Scripts and which one on Systems.
Conclusion
The Script Framework is some point in the middle between Entities with no logic at all and Entities with all the logic. It should be used with care, learning to balance which code should be on Scripts and which code on Systems is not easy.
Artemis is only a small core, a foundation of classes to work with. The real power comes from the custom Components and Systems you create over it. For example, in our case we created several Systems that we reuse between games, some of them are the RenderSystem responsible of rendering the entities with the RenderComponent using libGDX and the PhysicsSystem responsible of processing the Box2d world.
References
There are a lot of resources about components based entity systems, however the best/correct solution between all these references is not so clear.
- Artemis Entity System - http://gamadu.com/artemis/
- Slick Forums - topic - Artemis Entity System Framework - http://slick.javaunlimited.net/viewtopic.php?f=10&t=3076
- Entity/Component Game Design That Works: The Artemis Framework - http://piemaster.net/2011/07/entity-component-artemis/
- PushButton Engine - http://pushbuttonengine.com/
- Entity System: RDBMS-beta (a new example with source) - T-machine - http://t-machine.org/index.php/2011/08/22/entity-system-rdbms-beta-a-new-example-with-source/
- Evolve your hierarchy - Cowboy Programming - http://cowboyprogramming.com/2007/01/05/evolve-your-heirachy/
- Game Objects 1 - Game Architect - http://gamearchitect.net/Articles/GameObjects1.html
- Data-Driven Design - Game Architect - http://gamearchitect.net/Articles/DataDrivenDesign.html
- Entity Systems - Tom Davies - http://www.tomseysdavies.com/2011/01/23/entity-systems/
- Writing Reusable Code - Games From Within - http://gamesfromwithin.com/writing-reusable-code
- Data Oriented Design now and in the future - Games From Within - http://gamesfromwithin.com/data-oriented-design-now-and-in-the-future
- Scott Bilas Game Objects - http://scottbilas.com/files/2002/gdc_san_jose/game_objects_slides.ppt
Hope you like it.