Our solution to handle multiple screen sizes in Android – Part two
Continuing with the previous blog post, in this post we are going to talk about the code behind the theory. It consists in three concepts, the VirtualViewport, the OrthographicCameraWithVirtualViewport and the MultipleVirtualViewportBuilder.
VirtualViewport
It defines a virtual area where the game stuff is contained and provides a way to get the real width and height to use with a camera in order to always show the virtual area. Here is the code of this class:
public class VirtualViewport {

	float virtualWidth;
	float virtualHeight;

	public float getVirtualWidth() {
		return virtualWidth;
	}

	public float getVirtualHeight() {
		return virtualHeight;
	}

	public VirtualViewport(float virtualWidth, float virtualHeight) {
		this(virtualWidth, virtualHeight, false);
	}

	public VirtualViewport(float virtualWidth, float virtualHeight, boolean shrink) {
		this.virtualWidth = virtualWidth;
		this.virtualHeight = virtualHeight;
	}

	public float getWidth() {
		return getWidth(Gdx.graphics.getWidth(), Gdx.graphics.getHeight());
	}

	public float getHeight() {
		return getHeight(Gdx.graphics.getWidth(), Gdx.graphics.getHeight());
	}

	/**
	 * Returns the view port width to let all the virtual view port to be shown on the screen.
	 *
	 * @param screenWidth
	 *            The screen width.
	 * @param screenHeight
	 *            The screen Height.
	 */
	public float getWidth(float screenWidth, float screenHeight) {
		float virtualAspect = virtualWidth / virtualHeight;
		float aspect = screenWidth / screenHeight;
		if (aspect > virtualAspect || (Math.abs(aspect - virtualAspect) < 0.01f)) {
			return virtualHeight * aspect;
		} else {
			return virtualWidth;
		}
	}

	/**
	 * Returns the view port height to let all the virtual view port to be shown on the screen.
	 *
	 * @param screenWidth
	 *            The screen width.
	 * @param screenHeight
	 *            The screen Height.
	 */
	public float getHeight(float screenWidth, float screenHeight) {
		float virtualAspect = virtualWidth / virtualHeight;
		float aspect = screenWidth / screenHeight;
		if (aspect > virtualAspect || (Math.abs(aspect - virtualAspect) < 0.01f)) {
			return virtualHeight;
		} else {
			return virtualWidth / aspect;
		}
	}

}
So, if we have a virtual area of 640x480 and want to show it on a screen of 800x480 we can do the next steps in order to get the proper values that we have to use as the camera viewport for that screen:
VirtualViewport virtualViewport = new VirtualViewport(640, 480);
float realViewportWidth = virtualViewport.getWidth(800, 480);
float realViewportHeight = virtualViewport.getHeight(800, 480);
// now set the camera viewport values
camera.setViewportFor(realViewportWidth, realViewportHeight);
OrthographicCameraWithVirtualViewport
In order to simplify the work when using LibGDX library, we created a subclass of LibGDX’s OrthographicCamera with specific behavior to update the camera viewport using the VirtualViewport values. Here is its code:
public class OrthographicCameraWithVirtualViewport extends OrthographicCamera {

	Vector3 tmp = new Vector3();
	Vector2 origin = new Vector2();
	VirtualViewport virtualViewport;

	public void setVirtualViewport(VirtualViewport virtualViewport) {
		this.virtualViewport = virtualViewport;
	}

	public OrthographicCameraWithVirtualViewport(VirtualViewport virtualViewport) {
		this(virtualViewport, 0f, 0f);
	}

	public OrthographicCameraWithVirtualViewport(VirtualViewport virtualViewport, float cx, float cy) {
		this.virtualViewport = virtualViewport;
		this.origin.set(cx, cy);
	}

	public void setPosition(float x, float y) {
		position.set(x - viewportWidth * origin.x, y - viewportHeight * origin.y, 0f);
	}

	@Override
	public void update() {
		float left = zoom * -viewportWidth / 2 + virtualViewport.getVirtualWidth() * origin.x;
		float right = zoom * viewportWidth / 2 + virtualViewport.getVirtualWidth() * origin.x;
		float top = zoom * viewportHeight / 2 + virtualViewport.getVirtualHeight() * origin.y;
		float bottom = zoom * -viewportHeight / 2 + virtualViewport.getVirtualHeight() * origin.y;

		projection.setToOrtho(left, right, bottom, top, Math.abs(near), Math.abs(far));
		view.setToLookAt(position, tmp.set(position).add(direction), up);
		combined.set(projection);
		Matrix4.mul(combined.val, view.val);
		invProjectionView.set(combined);
		Matrix4.inv(invProjectionView.val);
		frustum.update(invProjectionView);
	}

	/**
	 * This must be called in ApplicationListener.resize() in order to correctly update the camera viewport.
	 */
	public void updateViewport() {
		setToOrtho(false, virtualViewport.getWidth(), virtualViewport.getHeight());
	}
}
MultipleVirtualViewportBuilder
This class allows us to build a better VirtualViewport given the minimum and maximum areas we want to support performing the logic we explained in the previous post. For example, if we have a minimum area of 800x480 and a maximum area of 854x600, then, given a device of 480x320 (3:2) it will return a VirtualViewport of 854x570 which is a good match of a resolution which contains the minimum area and is smaller than the maximum area and has the same aspect ratio of 480x320.
public class MultipleVirtualViewportBuilder {

	private final float minWidth;
	private final float minHeight;
	private final float maxWidth;
	private final float maxHeight;

	public MultipleVirtualViewportBuilder(float minWidth, float minHeight, float maxWidth, float maxHeight) {
		this.minWidth = minWidth;
		this.minHeight = minHeight;
		this.maxWidth = maxWidth;
		this.maxHeight = maxHeight;
	}

	public VirtualViewport getVirtualViewport(float width, float height) {
		if (width >= minWidth && width <= maxWidth && height >= minHeight && height <= maxHeight)
			return new VirtualViewport(width, height, true);

		float aspect = width / height;

		float scaleForMinSize = minWidth / width;
		float scaleForMaxSize = maxWidth / width;

		float virtualViewportWidth = width * scaleForMaxSize;
		float virtualViewportHeight = virtualViewportWidth / aspect;

		if (insideBounds(virtualViewportWidth, virtualViewportHeight))
			return new VirtualViewport(virtualViewportWidth, virtualViewportHeight, false);

		virtualViewportWidth = width * scaleForMinSize;
		virtualViewportHeight = virtualViewportWidth / aspect;

		if (insideBounds(virtualViewportWidth, virtualViewportHeight))
			return new VirtualViewport(virtualViewportWidth, virtualViewportHeight, false);

		return new VirtualViewport(minWidth, minHeight, true);
	}

	private boolean insideBounds(float width, float height) {
		if (width < minWidth || width > maxWidth)
			return false;
		if (height < minHeight || height > maxHeight)
			return false;
		return true;
	}

}
In case the aspect ratio is not supported, it will return the minimum area.
Floating elements
As we explained in the previous post, there are some cases where we need stuff that should be always at fixed positions in the screen, for example, the audio and music buttons in Clash of the Olympians. In order to do that we need to make the position of those buttons depend on the VirtualViewport. In the next section where we explain how to use all together we show an example of how to do a floating element.
Using the code together
Finally, here is an example showing how to use these concepts in a LibGDX application:
public class VirtualViewportExampleMain extends com.badlogic.gdx.Game {

	private OrthographicCameraWithVirtualViewport camera;

	// extra stuff for the example
	private SpriteBatch spriteBatch;
	private Sprite minimumAreaSprite;
	private Sprite maximumAreaSprite;
	private Sprite floatingButtonSprite;
	private BitmapFont font;

	private MultipleVirtualViewportBuilder multipleVirtualViewportBuilder;

	@Override
	public void create() {
		multipleVirtualViewportBuilder = new MultipleVirtualViewportBuilder(800, 480, 854, 600);
		VirtualViewport virtualViewport = multipleVirtualViewportBuilder.getVirtualViewport(Gdx.graphics.getWidth(), Gdx.graphics.getHeight());

		camera = new OrthographicCameraWithVirtualViewport(virtualViewport);
		// centers the camera at 0, 0 (the center of the virtual viewport)
		camera.position.set(0f, 0f, 0f);

		// extra code
		spriteBatch = new SpriteBatch();

		Pixmap pixmap = new Pixmap(64, 64, Format.RGBA8888);
		pixmap.setColor(Color.WHITE);
		pixmap.fillRectangle(0, 0, 64, 64);

		minimumAreaSprite = new Sprite(new Texture(pixmap));
		minimumAreaSprite.setPosition(-400, -240);
		minimumAreaSprite.setSize(800, 480);
		minimumAreaSprite.setColor(0f, 1f, 0f, 1f);

		maximumAreaSprite = new Sprite(new Texture(pixmap));
		maximumAreaSprite.setPosition(-427, -300);
		maximumAreaSprite.setSize(854, 600);
		maximumAreaSprite.setColor(1f, 1f, 0f, 1f);

		floatingButtonSprite = new Sprite(new Texture(pixmap));
		floatingButtonSprite.setPosition(virtualViewport.getVirtualWidth() * 0.5f - 80, virtualViewport.getVirtualHeight() * 0.5f - 80);
		floatingButtonSprite.setSize(64, 64);
		floatingButtonSprite.setColor(1f, 1f, 1f, 1f);

		font = new BitmapFont();
		font.setColor(Color.BLACK);
	}

	@Override
	public void resize(int width, int height) {
		super.resize(width, height);

		VirtualViewport virtualViewport = multipleVirtualViewportBuilder.getVirtualViewport(Gdx.graphics.getWidth(), Gdx.graphics.getHeight());
		camera.setVirtualViewport(virtualViewport);

		camera.updateViewport();
		// centers the camera at 0, 0 (the center of the virtual viewport)
		camera.position.set(0f, 0f, 0f);

		// relocate floating stuff
		floatingButtonSprite.setPosition(virtualViewport.getVirtualWidth() * 0.5f - 80, virtualViewport.getVirtualHeight() * 0.5f - 80);
	}

	@Override
	public void render() {
		super.render();
		Gdx.gl.glClearColor(1f, 0f, 0f, 1f);
		Gdx.gl.glClear(GL10.GL_COLOR_BUFFER_BIT);
		camera.update();

		// render stuff...
		spriteBatch.setProjectionMatrix(camera.combined);
		spriteBatch.begin();
		maximumAreaSprite.draw(spriteBatch);
		minimumAreaSprite.draw(spriteBatch);
		floatingButtonSprite.draw(spriteBatch);
		font.draw(spriteBatch, String.format("%1$sx%2$s", Gdx.graphics.getWidth(), Gdx.graphics.getHeight()), -20, 0);
		spriteBatch.end();
	}

	public static void main(String[] args) {
		LwjglApplicationConfiguration config = new LwjglApplicationConfiguration();

		config.title = VirtualViewportExampleMain.class.getName();
		config.width = 800;
		config.height = 480;
		config.fullscreen = false;
		config.useGL20 = true;
		config.useCPUSynch = true;
		config.forceExit = true;
		config.vSyncEnabled = true;

		new LwjglApplication(new VirtualViewportExampleMain(), config);
	}

}
In the example there are three colors, green represents the minimum supported area, yellow the maximum supported area and red represents the area outside. If we see red it means that aspect ratio is not supported. There is a floating element colored white, which is always relocated in the top right corner of the screen, unless we are on an unsupported aspect ratio, in that case it is just located in the top right corner of the green area.
The next video shows the example in action:
UPDATE: you can download the source code to run on Eclipse from here.
Conclusion
In these two blog posts we explained in a simplified way how we managed to support different aspect ratios and resolutions for Clash of the Olympians, a technique that could be used as an acceptable way of handling different screen sizes for a wide range of games, and it is not hard to use.
As always, we hope you liked it and that it could be useful for you when developing your games. Opinions and suggestions are always welcome if you want to comment 🙂 and also share it if you liked it and think other people could benefit from this code.
Thanks for reading.
Our solution to handle multiple screen sizes in Android - Part one
Developing games for multiple devices is not an easy task. Given the variety of devices, one of the most common problem is having to handle multiple screen sizes, which means different resolutions and aspect ratios.
In this blog post we want to share what we did to minimize this problem when making Ironhide’s Clash of the Olympians for Android.
In the next sections we are going to show some common ways of handling the multiple screens problem and then our way.
Stretching the content
One common approach when developing a game is making the game for a fixed resolution, for example, making the game for 800x480.
Based on that, you can have the next layout in one of your game’s screens:

Main screen of Clash of the Olympians in a 800x480 device.
Then, to support other screen sizes the idea is to stretch the content to the other device screen:

Main screen on a 800x600 device, stretched from 800x480.
The main problem is that the aspect ratio is affected and that is visually unacceptable.
Stretching + keeping aspect ratio
To solve part of the previous problem, one common technique is stretching but keeping the correct aspect ratio by adding dead space to the borders of the screen so the real game area aspect ratio is the same on different devices. For example:

Main screen in a 800x600 device with borders.

Main screen in a 854x480 device with borders.
This is an easy way to attack this multiple screen size problem, you can even create some nice borders instead of the black borders shown in the previous image to improve how it looks.
However, in some cases this is not acceptable either since it doesn’t look so good or it feels like the game wasn’t made for that device.
Our solution: Using a Virtual Viewport
Our approach consists in adapting what is shown in the game screen area to the device screen size.
First, we define a range of aspect ratios we want to support, for example, in the case of clash we defined 4:3 (800x600) and 16:9 (854x480) as our border case aspect ratios, so all aspect ratios in the middle of those two should be supported.
Given those two aspect ratios, we defined our maximum area as 854x600 and our minimum area as 800x480 (the union and intersection between 800x600 and 854x480, respecively). The idea is to cover the maximum area with stuff, but the important stuff (buttons, information, etc) should be always included in the minimum area.
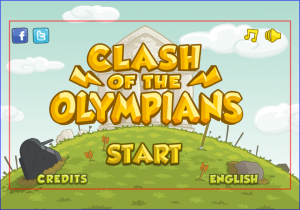
The red rectangle shows the minimum area while the blue rectangle shows the maximum area.
Then, given a device resolution we calculate an area that matches the device aspect ratio and is included in the virtual area. For example, given a device with a resolution of 816x544 (4:3), this is what is shown:
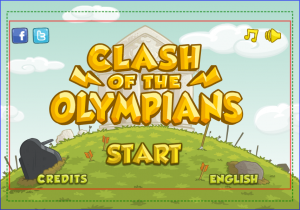
The green rectangle shows the matching area for 816x544.
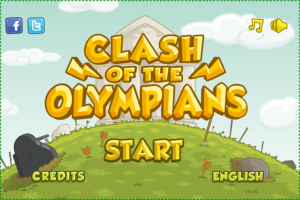
This is how the main screen is shown in a 816x544 device.
In case we are on a bigger or lower resolution than the maximum or minimum area we defined, respectively, for example a screen of 480x320 (3:2), what we do is calculate the aspect ratio and find a corresponding match for that aspect ratio in the area we defined. In the case of the example, one match could be 800x534 since it is 3:2 aspect ratio and it is inside our virtual area. Then we scale down to fit the screen.
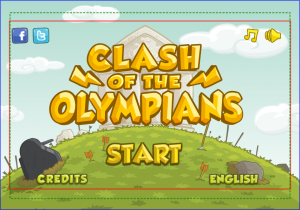
The green rectangle shows the calculated area for a resolution of 800x534 (matching the aspect of the 480x320 device).
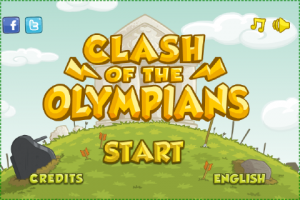
This is what is shown of the main screen in a 480x320 device (click to enlarge the image).
Floating elements
For some elements of the game, such as buttons, maintaining their fixed world position for different screen sizes doesn’t look good, so what we do is making them floating elements. That means they are always at the same screen position, the next images shows an example with the main screen buttons:

Main screen's buttons distribution for a 854x480 device.
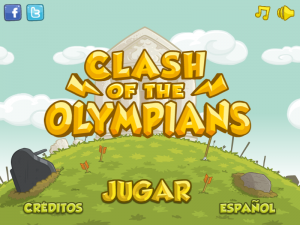
Main screen's buttons distribution for a 800x600 device. As you can see, buttons are relocated to match the screen size.
Finally, we want to show a video of this multiple screen sizes auto adjustment in real time:
Adjusting the game to the screen size in real time.
Some limitations
As we are scaling up/down in some cases to match the corresponding screen, some devices could perceive some blur since we are using linear filtering and the final position of the elements after the camera transformations could be not integer positions. This problem is minimized with better density devices and assets.
Layouts could change between different devices, for example, the layout for a phone could be different to the layout of a tablet device.
Text is a special case, when rendering text just downscaling it is not a correct solution since it could be not readable. You may have to re-layout text for lower resolution devices to show it bigger and readable.
Conclusion
If you design your game screens follow this approach, it is not so hard to support multiple screen sizes in an acceptable way. However there is still a lot of detail to take care of, like the problems we talked in the previous section.
In the next part of this blog post we will show some code based on LibGDX for those interested in how we implemented all this.
Thanks for reading and hope you liked it.
Clash of the Olympians for Android
For the last eight months approx we were working with Ironhide Game Studio on a port to Android of their game Clash of the Olympians originally made for Flash. We are happy to announce that it was released on Google Play on last December 6th.
It is not a direct port since it has new features like bonuses for making combos during the game, new enemy behaviors, a hero room to see your score when you finish the game and multiple save slots. Also, the game mechanics changed a bit since they were adapted to touch devices and the game was rebalanced to match the new controls.
If you didn’t already, go and get it on Google Play:
https://play.google.com/store/apps/details?id=com.ironhide.games.clashoftheolympians
QR code:
Hope you enjoy it.
Decoupling game logic from input handling logic
In this post we want to share how we are decoupling our game logic from the input handling as we explained briefly in a previous post about different controls we tested for Super Flying Thing.
Introduction
There are different ways to handle the input in a game. Basically, you could have a framework that provides a way to define event handlers for each input event, or to poll input values from the API. LibGDX provides both worlds so it is up to you what you consider best for your game. We prefer to poll for input values for the game logic itself.
When starting to make games, you probably feel tempted to add the input handling logic in one or more base concepts of your game, for example, if you were making Angry Birds you probably would add it to the Slingshot class to detect when to fire a bird or not. That is not totally bad if you are making a quick prototype but it is not recommended for long term because it would be harder to add or change between different control implementations.
Abstracting the input
To improve a bit this scenario in our games, we are using an intermediary class named Controller. That class provides values more friendly and related with the game concepts. A possible Controller class for our example could be:
class SlingshotController {
	boolean charging;
	Vector2 direction;
}
Now, we could process the input handling in one part of the code and update a common Controller instance shared between it and the game logic. Something like this:
class SlingshotMouseControllerLogic extends InputListener {

	Slingshot slingshot;
	SlingshotController controller;

	public boolean touchDown (InputEvent event, float x, float y, int pointer, int button) {
		slingshotPosition = slingshot.getPosition();
		controller.charging = slingshotPosition.isNear(x,y);
		return controller.charging;
	}

	public void touchUp (InputEvent event, float x, float y, int pointer, int button) {
		if (!controller.charging)
			return;
		controller.charging = false;
	}

	public void touchDragged (InputEvent event, float x, float y, int pointer) {
		if (!controller.charging)
			return;
		slingshotPosition = slingshot.getPosition();
		controller.direction.set(slingshotPosition);
		controller.direction.sub(x,y);
	}
}
Or if you are polling the input:
class SlingshotMouseControllerLogic implements Updateable {

	Slingshot slingshot;
	SlingshotController controller;

	boolean touchWasPressed = false;

	public void update(float delta) {
		boolean currentTouchPressed = Gdx.input.isPressed();

		slingshotPosition = slingshot.getPosition();
		x = Gdx.input.getX();
		y = Gdx.input.getY();

		if (!touchWasPressed && currentTouchPressed) {
			controller.charging = slingshotPosition.isNear(x,y);
			touchWasPressed = true;
		}

		if(touchWasPressed && !currentTouchPressed) {
			controller.charging = false;
			touchWasPressed = false
		}

		if (!controller.charging)
			return;

		controller.direction.set(slingshotPosition);
		controller.direction.sub(x,y);
	}

}
Now, the Slingshot implementation will look something like this:
class Slingshot {

	// multiple fields
	// render logic

	Controller controller;
	boolean wasCharging = false;

	update() {
		if (controller.charging && !wasCharging) {
			// starts to draw stuff based on the state we are now charging...

			// charges a bird in the slingshot.

			wasCharging = true;
		} else if (!controller.charging && wasCharging) {
			// stops drawing the slingshot as charging

			// fires the bird!!

			wasCharging = false;
		}
		// more stuff...
	}
}
As you can see, the game concept Slingshot doesn’t know anything about input anymore and we could switch to use the keyboard, Xbox 360 Controller, etc, and the game logic will not notice the change.
Conclusion
Decoupling your game logic from the input by abstracting it in a class is a good way to keep your game logic depending mainly on game concepts making it easier to understand and improving its design. Also, it is a good way to create several controls for the game (input, AI, network, recorded input, etc), while the game logic don’t even notice the change.
This post provides a really simple concept, the concept of abstraction, it is nothing new and probably most of the game developers are already doing this, even though we wanted to share it, maybe it is helpful for someone.
We tried to use simple and direct code in this post to increase understandability, however in our games, as we use an entity system framework, we do it a bit different using components, scripts and systems instead of direct classes for concepts like the class Slingshot we presented in this post, but that’s food for another blog post.
Finally, we use another abstraction layer over the framework input handling which provides us a better and simplified API to poll info from, that’s why we prefer to poll values, food for another post as well.
Hope you like it, as always.
Drawing a projectile trajectory like Angry Birds using LibGDX
We had to implement a projectile trajectory like Angry Birds for our current game and we wanted to share a bit how we did it.
Introduction
In Angry Birds, the trajectory is drawn after you fired a bird showing its trajectory to help you decide the next shot. Knowing the trajectory of the current projectile wasn’t totally needed in that version of the game since you have the slingshot and that tells you, in part, where the current bird is going.
In Angry Birds Space, they changed to show the trajectory of the current bird because they changed the game mechanics and now birds can fly different depending the gravity of the planets, the slingshot doesn’t tell you the real direction anymore. So, that was the correct change to help the player with the new rules.
We wanted to test how drawing a trajectory, like Angry Birds Space does for the next shot, could help the player.
Calculating the trajectory
The first step is to calculate the function f(t) for the projectile trajectory. In our case, projectiles have a normal behavior (there are no mini planets) so the formula is simplified:

We found an implementation for the equation in stackoverflow, here the code is:
class ProjectileEquation {

	public float gravity;
	public Vector2 startVelocity = new Vector2();
	public Vector2 startPoint = new Vector2();

	public float getX(float t) {
		return startVelocity.x * t + startPoint.x;
	}

	public float getY(float t) {
		return 0.5f * gravity * t * t + startVelocity.y * t + startPoint.y;
	}
}
With that class we have an easy way to calculate x and y coordinates given the time.
Drawing it to the screen
If we follow a similar approach of Angry Birds, we can draw colored points for the projectile trajectory.
In our case, we created a LibGDX Actor dedicated to draw the Trajectory of the projectile. It first calculates the trajectory using the previous class and then renders it by using a Sprite and drawing it for each point of the trajectory by using the SpriteBatch’s draw method. Here is the code:
public static class Controller  {

	public float power = 50f;
	public float angle = 0f;

}

public static class TrajectoryActor extends Actor {

	private Controller controller;
	private ProjectileEquation projectileEquation;
	private Sprite trajectorySprite;

	public int trajectoryPointCount = 30;
	public float timeSeparation = 1f;

	public TrajectoryActor(Controller controller, float gravity, Sprite trajectorySprite) {
		this.controller = controller;
		this.trajectorySprite = trajectorySprite;
		this.projectileEquation = new ProjectileEquation();
		this.projectileEquation.gravity = gravity;
	}

	@Override
	public void act(float delta) {
		super.act(delta);
		projectileEquation.startVelocity.set(controller.power, 0f);
		projectileEquation.startVelocity.rotate(controller.angle);
	}

	@Override
	public void draw(SpriteBatch batch, float parentAlpha) {
		float t = 0f;
		float width = this.width;
		float height = this.height;

		float timeSeparation = this.timeSeparation;

		for (int i = 0; i < trajectoryPointCount; i++) {
			float x = this.x + projectileEquation.getX(t);
			float y = this.y + projectileEquation.getY(t);

			batch.setColor(this.color);
			batch.draw(trajectorySprite, x, y, width, height);

			t += timeSeparation;
		}
	}

	@Override
	public Actor hit(float x, float y) {
		return null;
	}
}
The idea of using the Controller class is to be able to modify the values from outside of the actor by using a shared class between different parts of the code.
Further improvements
To make it look nicer, one possible addition is to decrement the size of the trajectory points and to reduce their opacity.
In order to do that we drawn each point of the trajectory each time with less alpha in the color and smaller by changing the width and height when calling spritebatch.draw().
We also added a fade in transition to show the trajectory instead making it instantly appear and that works great too, but that is in the game.
Another possible improvement, but depends on the game you are making, is to separate the points using a fixed distance. In order to do that, we have to be dependent on x and not t. So we added a method to the ProjectileEquation class that given a fixed distance and all the values of the class it returns the corresponding t in order to maintain the horizontal distance between points, here is the code:
public float getTForGivenX(float x) {
		return (x - startPoint.x) / (startVelocity.x);
}
Now we can change the draw method of the TrajectoryActor to do, before starting to draw the points:
float fixedHorizontalDistance = 10f;
timeSeparation = projectileEquation.getTForGivenX(fixedHorizontalDistance);
Not sure which one is the best option between using x or t as the main variable, as I said before, I suppose it depends on the game you are making.
Here is a video showing the results:
If you want to see it working you can test the webstart of the prototypes project, or you can go to the code and see the dirty stuff.
Conclusion
Making a trajectory if you know the correct formula is not hard and it looks nice, it also could be used to help the players maybe as part of the basic gameplay or maybe as a powerup.
Hope you like it.
